Accessing Vega
Traditionally, users accessed Vega via SSH using tools such as MobaXterm or PuTTY. However, Visual Studio Code (VS Code) offers a more integrated environment with a built-in terminal, file browser, editor, and many other extensions. This guide covers how to connect to Vega using VS Code. It is not meant to be a comprehensive tutorial on using VS Code, but rather a quick setup guide to get you connected and ready to work on Vega.
Note
Connecting to Vega requires VPN access unless you are on a campus wired network, as well as valid authentication credentials. This guide does not cover VPN or credential setup.
Step 1: Install the Remote SSH Extension
Install the Remote - SSH extension from the VS Code Marketplace.

This extension allows you to open a remote terminal, edit files, and manage your HPC environment directly within VS Code.
Step 2: Open the Remote Explorer
After installation, a new icon will appear in the left sidebar — a computer symbol with ><.
Click this icon to open the Remote Explorer. From here you can manage and connect to SSH hosts.
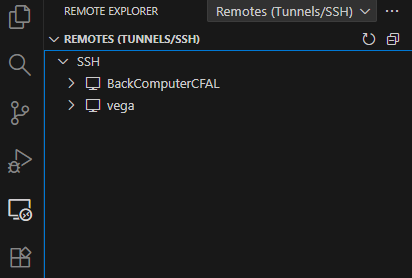
The image above shows the Remote Explorer with 2 SSH hosts already configured. Yours will most likely be empty until you add Vega as a new SSH host.
Step 3: Add and Connect to Vega
- Hover over the SSH tab in the Remote Explorer — a + icon will appear. Click it to add a new connection.
- Enter your SSH connection string at the top of the VS Code window:
Replace
usernamewith your actual Vega username. - When prompted, select the SSH configuration file to update. The default is usually: This file will be stored on your local computer and is essentially a list of all the SSH connections you have set up, along with any specific settings for each host so you don't have to remember them every time.
- Return to the Remote Explorer. Hover over your new connection and click the arrow icon that appears to connect.
- On first connection, VS Code will ask which platform you are connecting to — select Linux.
- Enter your Vega password when prompted and press Enter.
Step 4: Set Up SSH Keys (Optional)
To avoid entering your password every time you connect, you can configure SSH key authentication.
Generate an SSH Key Pair
- Open PowerShell or Command Prompt on your local machine.
- Run:
- Press Enter to accept the default file path, or specify a custom one.
- Enter a passphrase when prompted (optional but recommended).
Your keys will be saved to C:\Users\yourname\.ssh\ by default:
- Private key (id_ed25519) — keep this secure and never share it.
- Public key (id_ed25519.pub) — this is what gets copied to Vega.
Copy the Public Key to Vega
- Copy
id_ed25519.pubto Vega's~/.ssh/folder (if ~/.ssh/ does not exist, create it). - On Vega, append the key to the
authorized_keysfile: - Set the correct permissions:
Update Your VS Code SSH Config
- In the Remote Explorer, hover over the SSH tab and click the gear icon to open the SSH config file.
- It should look like this:
- Add your key and optionally set a short alias:
- Save and close the file. You should now be able to connect without entering a password.
Note: If you set a passphrase for your SSH key, you will still need to enter it when connecting unless you use an SSH agent to manage your keys. It's usually recommend to add a passphrase for security.
Lastly, you can reuse keys on multiple machines, but it's not recommended.
Next: Vega Basics